在Win11中安装WSL2
注意
在 Win11 上使用最新的 WSL2, 不需要在控制面板 - 程序 - 启用或关闭 Windows 功能中进行手动设置了, 安装子系统时会自动检测并开启必要的配置
以管理员身份打开powershell,输入wsl,如果之前没安装过,powershell会提醒按任意键开始下载并进行安装。
安装完成后,就可以使用wsl的一系列命令进行子系统安装
bash
wsl --list --online # 列出所有可选的子系统
wsl --install -d Ubuntu-24.04 --web-download
# 加 --web-download 是为了从 Internet 而不是 Microsoft Store 下载分发版。
wsl --list # 查看已经安装的子系统
wsl --terminate <DIS> # 停止运行某个子系统
wsl --unregister <DIS> # 卸载某个子系统
wsl --set-default <DIS> # 设置默认子系统
wsl --update # 更新wsl安装完成后,输入wsl进入子系统。进入子系统后,sudo passwd root修改root密码,在安装时会让配置一个用户。然后安装oh-my-zsh和starship美化终端。
bash
# 安装zsh
apt install -y zsh
chsh -s /bin/zsh
# 安装oh-my-zsh
sh -c "$(curl -fsSL https://raw.githubusercontent.com/ohmyzsh/ohmyzsh/master/tools/install.sh)"
# 安装starship
curl -sS https://starship.rs/install.sh | sh配置~/.zshrc,添加eval "$(starship init zsh)"或者在plugin中添加starship以启用starship。
关于starsip,在安装前需要安装Nerd Fonts中的一种,比如Fira Code Nerd Font。
启用starship后,查看预设中的主体,并配置,比如
bash
starship preset gruvbox-rainbow -o ~/.config/starship.toml如果没有.config文件夹需要手动创建。
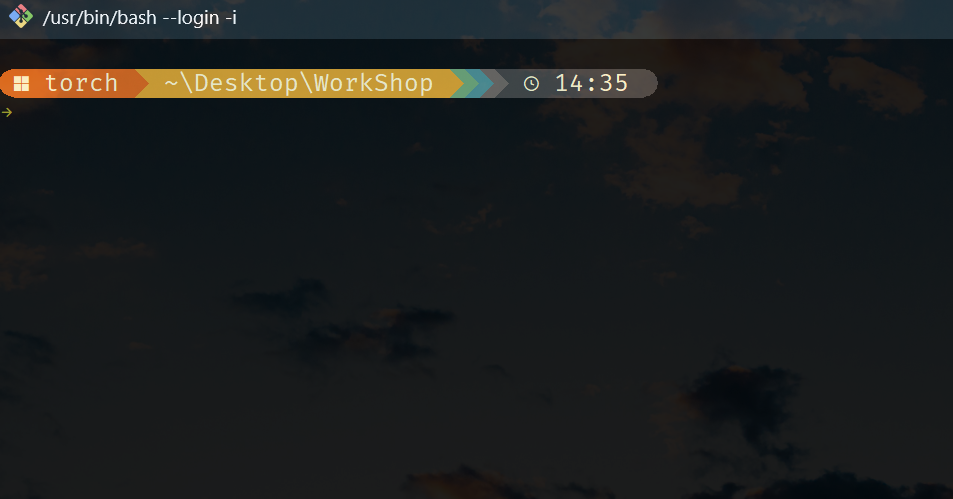
GIT BASH 使用 Starship
使用conda install starship安装starship,然后在~/.bash_profile中添加eval "$(starship init bash)",主题配置与上相同。
配置完主题后,修改选项 - 文本,改字体为Fira Nerd,显示效果如下所示

修改 VSCode 终端
使用ctrl + shift + p,搜索settings.json,添加如下两行,修改vscode的终端显示。
json
{
    "terminal.integrated.fontFamily": "FiraCode Nerd Font Mono",
    "terminal.integrated.fontSize": 12,
}